
Instructions:
1.Cut a 4-1/4x4-1/4 card base
2.Using the largest of the dotted circle dies create a shaped card by lining the die slightly over the folded edge. (see video for placement)
3.Die cut the next size of the dotted circle dies using white card stock 2 times
4.Add one white circle to the inside of the card and the other white circle to the front of the card
5.Die cut the second largest scalloped circle from raspberry cardstock
6.Adhere this to the front of the card
7.Die cut the patterned paper with the third largest dotted circle die
8.Adhere onto the scalloped circle
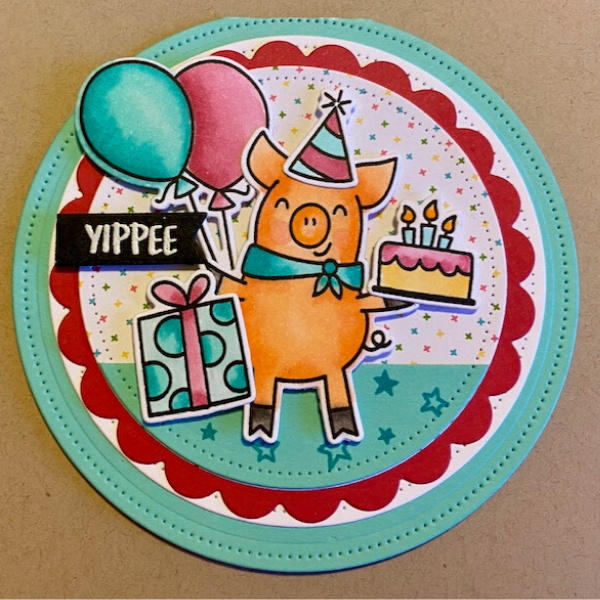
9.Die cut a small section of the same blue cardstock that you used for the base and stamp the stars from the sweet swines stamp set with Lawn Fawn peacock ink.(see video for size and placement)
10.Stamp and color the images from the Sweet Swines stamp set and cut them out with the coordinating dies
11.Use foam adhesive to adhere the images to the front of the card (see video for placement)
12.Stamp the “This calls for cake” on the inside of the card with jet black ink and add more stars to the upper portion of the inside of the card with the peacock ink
13.Heat emboss the “Yippee” sentiment using versa mark and white embossing powder
14.Die cut the sentiment using the everyday sentiment banner dies and trip to fit on the front of the card
15.Adhere the sentiment with foam squares
16.Add some glitter detail using the Lawn Fawn glitter pen
Products Used:
Avery Elle Sweet Swines Stamp Set
Avery Elle Sweet Swines Dies
Lawn Fawn Small Dotted Circle Stackables
Lawn Fawn Large Dotted Circle Stackables
Lawn Fawn Scalloped Circle Stackables
Lawn Fawn Everyday Sentiment Banners
Lawn Fawn Embossing Powder - White
Lawn Fawn Ink - Peacock
Lawn Fawn Petite Paper Pack - Spring Fling
Lawn Fawn Starry Stamp Shammy Case
Lawn Fawn Glitter Pen
Art Glitter Designer Adhesive
Art Glitter Ultrafine Metal Tip

