Thank you so much for stopping by and checking out this lovely project, let’s jump right into how it was made.

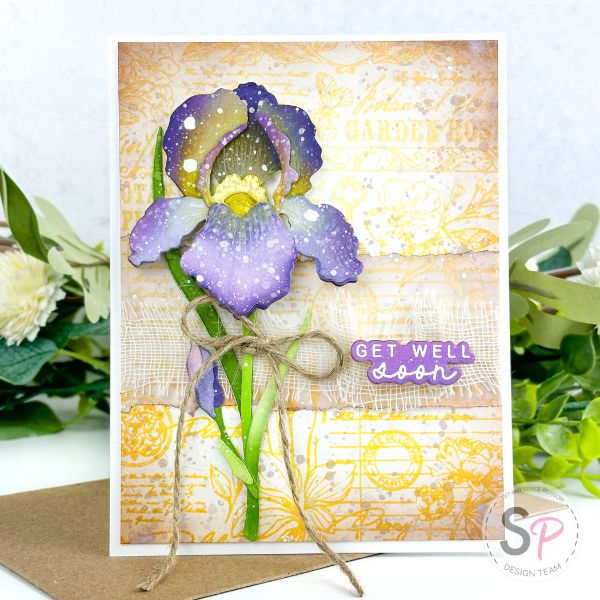
First, I like to cut down my cardstock to see what I am working with. I have an A2 base which is 4 1/4 by 5 ½, I cut the silver matte to be about ⅛ of an inch smaller than the base, and my white panel is about ¼ of an inch smaller than the base. I stamped the floral images out in black ink with my Misti so that I could stamp them again after they were coloured. I used two shades of Distress Oxide Ink for each flower for pink I used Kitsch Flamingon and Picked Raspberry, For yellow I used Squeezed Lemonade and Mustard Seed, For Orange I used Spiced Marmalade and Ripe Persimmon, For Purple I used Shaded Lilac and Wilted Violet and for the leaves I used Twisted Citron and Mowed Lawn for the greens and Tumbled Glass and Mermaid Lagoon for the blues.
Next, I die-cut out the flowers and the stamped sentiment with the machine dies. I also cut out a vase from the same silver cardstock I used for the matte layer. After I arranged the flowers how I wanted I used a piece of tape to keep them together while I worked on the composition of the card. For some added interest in the background, I wound some white and silver twine around the panel and used some foam tape to adhere the vase above it. All that is left is to adhere the layers and add some final touches, I bought in a few silver pearls that I added around the vase and flowers. Then I used a clear glitter pen and added a touch of glitter to each flower, being careful not to smudge the Oxide Ink.
Thank you so much for taking this quick look at how this card came together. If you would like a more in-depth look please check out the video below, I also have a complete supplies list in case you want to know exactly what I used. I hope to see you again very soon!!
Supplies: